Monday, June 9, 2014

DIY and Upcycled Furniture

Have you ever thought of making furniture out of every-day common items? Or even giving new purposes to old pieces of furniture? Well, this is an excellent post for you who's broke or simply like the idea of having a creative place.
Check some ideas below:


BOOKSHELF WITH TWO LADDERS AND PLANKS OF WOOD

CINDER BLOCKS FOR BED BASE

WOODEN PALLETS COUCH

CRATES INTO NIGHTSTAND

CUTTING BOARDS INTO COFFEE TABLE

FLOWERPOTS INTO TABLE BASE

FOLDING CHAIRS INTO SHELF/CLOSET UNIT

MAGAZINES, BELTS AND PILLOW FOR A STOOL

SHUTTERS INTO KITCHEN ISLAND

SHUTTERS INTO SHELF

SPOOL INTO BOOKCASE

WIRE BASKET'S ACCENT TABLE

WOODEN LADDER TO BOOKSHELF

So, do you feel inspired yet?
Please comment and share any similar ideas you might have! :)
Simplify & Beautify

Sunday, June 8, 2014

How to Make a Drawer Organizer

Have you been after a drawer organizer but aren't willing to spend the absurd amount of money that is usually charged for it? Well, I know the perfect solution! I will show you guys how to make a neat and clean drawer divider using only cardboard.
All you have to do is measure your drawer, get the materials necessary and follow the instructions below:

Materials needed:

  • Cardboard
  • Ruler
  • Box Cutter
HOW TO DO IT


Looks fantastic, huh?
The best part of it is that you can be environment-friendly AND create an organizer with the perfect measures of your own drawer.

Please leave your thoughts about it in the comments!
Simplify & Beautify


(References: 1)

Saturday, June 7, 2014

How to Clean a Laptop Screen

Is your laptop screen full of greasy marks and dust?
Does it look like it's never going to look like brand-new again? Don't worry!
I'll show you how to solve this problem, in a very easy, effective and simple way.
Check out the before and after of my boyfriend's laptop screen which I used this method on:


How to Do It

All you're gonna need is:

  • Microfiber cloth
  • Water

First of all, turn your laptop off and unplug it from the power outlet, now you're safe to clean it. Take a clean microfiber cloth (I got mine from the local dollar store), get it SLIGHTEST wet (attention: don't soak it in water!) and gently rub it in circular motions on your screen. The circular motion is the secret to clean it without leaving a path of dust on the screen.

Now enjoy your brand-new looking screen!
Simplify & Beautify

Friday, June 6, 2014

How to Clean a Nasty Shower Head

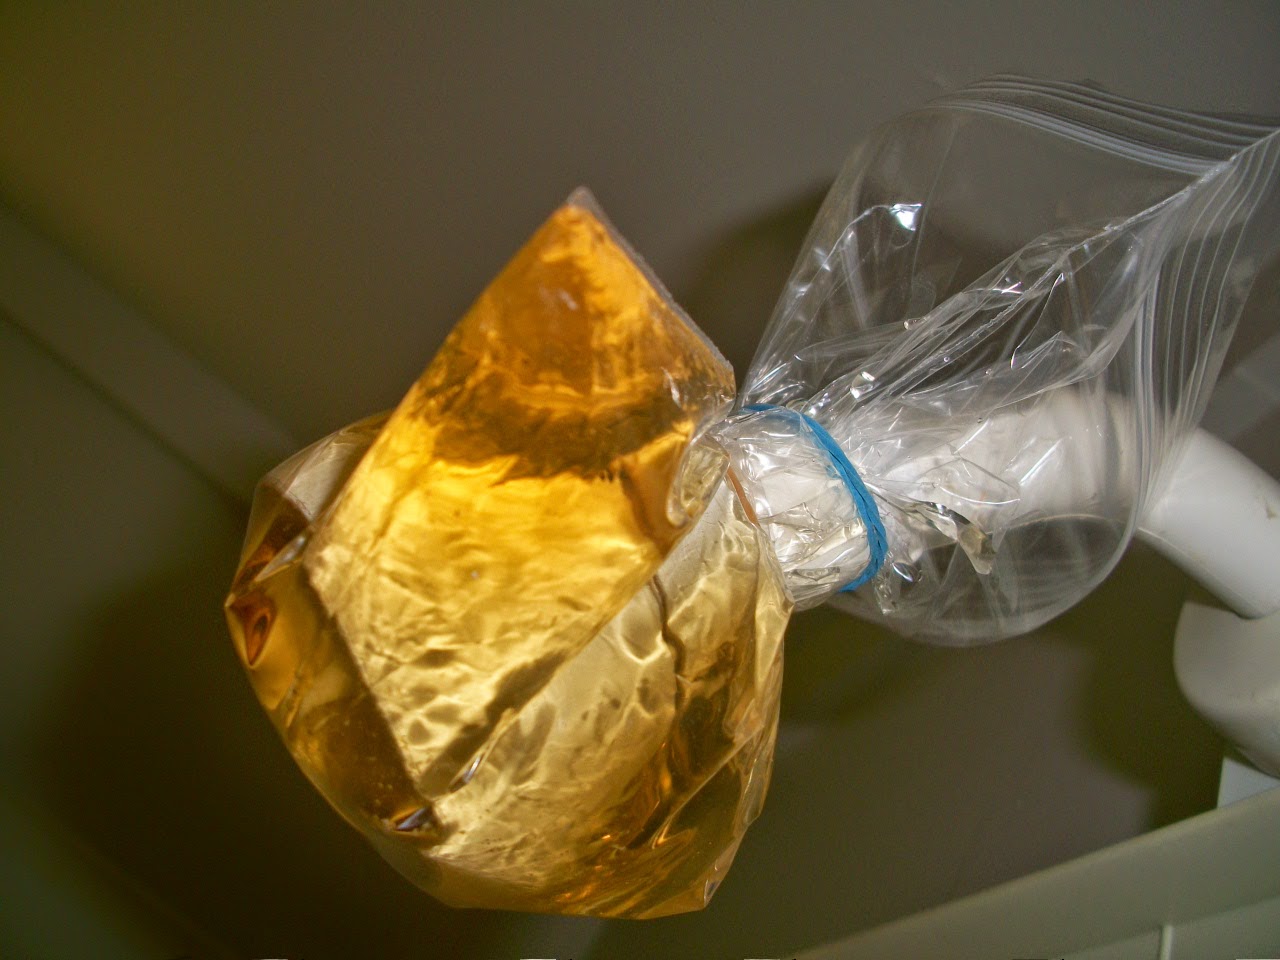
Our landlord decided to change our shower head after a leak problem we had, but the new one was nasty and greasy. It was already put in place before I noticed the state of it though.. So I had to come up with a good idea to clean it without taking it off.

Well, the results were amazing!


All you need is:

  • Vinegar (apple cider or white)
  • Sandwich Bag (or a bigger bag depending on the size of your shower head)
  • Elastic Bands
Simply pour vinegar into the bag (enough to cover the shower head) and let the shower head dive into it. Use elastic bands to make sure the bag won't go anywhere and leave it there overnight. In the morning I removed the bag and wiped the loose grease off the head and Voilá! Clean as new.


Let me know about your cleaning adventures' success stories aswell!

Simplify and Beautify!

Thursday, June 5, 2014

How to Clean a Nasty Sink


Have you moved into a new rental home, just like me, and met a kitchen sink left in a disgusting state by the last owner? It's never been easy getting rusty and other mysterious marks out of white porcelain sinks.. until now!

I'll show you guys how to properly clean and get rid of scratches in a porcelain sink, and even whiten it! The best part? It's all natural green cleaning!


I know, I know.. The "before" picture might not look so terrible because my camera wasn't able to focus the deep scratches and marks in the sink, but believe me.. 
it WAS terrible!

All you're gonna need is:

  • Rubber Gloves (optional)
  • Paper Towel
  • White Vinegar
  • Baking Soda
  • Salt
  • Lime

First I sprayed white vinegar all over the sink, then I poured the baking soda on top of it (you're gonna see a bubbly reaction). I left it there and focused on the individual scratches and rusty marks.. I poured a bit of salt on each of those and scrubbed with a piece of lime.. Here's where the magic is gonna happen!

Scrub and scrub until all the marks are gone, then rinse the sink thoroughly with hot water. To top it off, dry the sink, soak paper towels in white vinegar and then place them all over the sink, leave it there for at least half an hour. The vinegar is gonna act like a natural non-aggressive bleach and whiten the porcelain!

P.S.: don't forget to spray white vinegar and pour baking soda all over the faucet aswell and give it a good scrub with a piece of lime, it will shiiiine afterwards!

Amazing, right?
Simplify and Beautify!

Wednesday, June 4, 2014

Cardboard Box into Twine Basket

So, when we moved into our rental apartment there was already one of those wired over-the-toilet storages in our bathroom, like the one below:


The problem is that the cosmetics and products we keep on those shelves keep falling over, because of the wires. I had two ideas: either sew/glue some piece of fabric or something like that to make the shelves solid; or get some cute twine baskets to place the stuff in, like in the example below:


Covering the wires with a fabric would not look so clean, while using twine baskets in bathrooms, in my humble opinion, is absolutely elegant and beautiful. Yet another problem thou.. they are costly! And hard to find! So I decided to search our wonderful World Wide Web when I found this brilliant idea on how to turn a cardboard box into a twine basket.

Brilliant Idea

Turn a Wine cardboard box into a twine basket just by using hot glue, jute and a piece of cloth fabric.


LOOK HERE FOR TUTORIAL

Brilliant, huh?
I'm super happy to have found this brilliant idea and to re-share it with you guys!
I'll sure make my own twine baskets out of cardboard boxes soon.